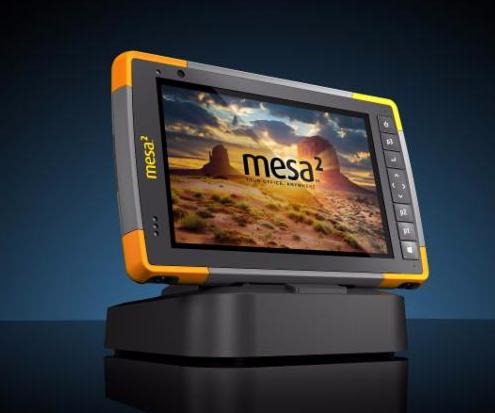
The Mesa 2 Rugged Tablet™ is different from other Juniper Systems handhelds in several key ways. Probably the biggest difference is in the operating system—the Mesa 2 runs full Windows 10, while other Juniper handhelds run on Windows Embedded Handheld.
Because it runs full Windows, the Mesa 2 Rugged Tablet has the performance and functionality of a desktop computer (a host computer), capable of running full software programs, analyzing data, and more. In comparison, handhelds that run on Windows Embedded Handheld (a client computer) must rely on a desktop computer for data transfer and further data analysis.
For the Mesa 2, this means that you don’t technically need to transfer collected data to another computer for data analysis. The Mesa 2 is capable of doing much of the processing work that would otherwise have been done on a desktop computer.
However, there are cases where users may want to transfer their data to another computer or network. But because of the difference in operating system, the process of transferring data from the Mesa 2 (host) to another (host) computer is different than it is for transferring data from Windows Embedded Handheld devices (client) to a host computer.
So in this post, we’re going to outline the various ways you can transfer data from the Mesa 2 to another computer or network, and back.

Ethernet – The M2 Dock makes transferring data over an Ethernet connection highly convenient, allowing you to transfer data to another computer or network while simultaneously charging your Mesa 2. When plugged into the M2 Dock, the Mesa 2 can even act as your desktop computer with a connected monitor, mouse, and keyboard. The M2 Dock eliminates the need for cumbersome chargers and cables, which is another huge plus in our book.
Get a quote on the M2 Dock by contacting us here.
If you don’t plan on purchasing an M2 Dock but still need to sync data frequently, then the second best option would be to use a USB to Ethernet cable, like this one, to connect the Mesa 2 to your network, and share files from there.

Wi-Fi® – Similar to Ethernet, Wi-Fi is another way you can transfer data from the Mesa 2 to a network or another computer. After connecting your Mesa 2 to Wi-Fi, you may be able to set up a shared folder or drive through which you can easily share files with other devices or networks. This wireless method of transferring data is a great option for eliminating the need for a wired connection.

Cloud Services – Transferring data over the cloud is quite simple. On the Mesa 2, Windows 10 initially requires you to login with a Microsoft account, which automatically provides you with access to OneDrive, Microsoft’s file storage/sharing service. You can then access uploaded files in OneDrive on any other computer either logged into the same Microsoft account, or with which the OneDrive folder has been shared. Other popular cloud-based file-sharing services include Dropbox and Google Drive. This is another great option for when you may not be in close proximity to the other computer or network you’re sharing files with.

Bluetooth® – Bluetooth is an easy and straightforward way to share files on your Mesa 2 with another device. To do this on the Mesa 2, swipe left from the right edge of the screen to open the Action Center and turn off the default Tablet mode. Tap the Bluetooth icon in the bottom-right system tray and select Receive a File. On the other computer you’re sharing files with, select to Send a File to transfer data (or vice verse to reverse data transfer direction). This method obviously requires that you’re within range of the device you want to share data with, so it does have limitations in that regard.
 USB Flash (Thumb) Drive – All you need to do to transfer files using a USB flash drive is to save your files on the drive from one device, eject it, and then insert the drive into another device to download the files. This is a simple way to share files when you’re at your desk and a network connection is not an option.

USB Bridge Cable – Using a USB Bridge cable, you can easily connect the Mesa 2 running Windows 10 to another computer and drag and drop files between the two. One option that we’ve found to work well is the Gearmo cable. If you have USB AutoRun enabled on your computer, then once you connect the Mesa 2 via the Gearmo cable, an EasyCopy software window will pop up automatically, displaying the contents of both computers and allowing you to drag files between them. This solution is an easy transition for customers who have used Juniper Systems handhelds with a USB connection in the past.

Email – Transferring files via email is not the most technologically advanced method out there, yet it’s a quick-and-dirty way to share a file if you’re in a pinch. The drawback to using email is the limited size of files that you can send, so it wouldn’t be the best option in some cases.
 MicroSDXC Card – The Mesa 2 has a MicroSDXC card that can be removed and used to share files with other computers, and we include it in this list because it is possible. However, the Mesa 2’s MicroSDXC card is located behind the sealed battery door and is not readily accessible, so this wouldn’t be the easiest method to transfer data.
To read more, visit our Support FAQ page about transferring files on the Mesa 2 here. Or, contact our service team for more detailed instructions on any of the above methods.
